开发基础
开发基础笔记
mybatis-plus通用的service方法
通过jenkins配置前后端自动打包及发布
mybatis-plus实现分页的方式
Java极客技术公众号PDF
狂神说SpringBoot
Hashids java 版使用
SpringBoot
1、Web快速开发
2、结果集的封装
3、集成MyBatis实现数据库操作
4、Springboot @Validated参数校验
5、SpringBoot全局异常处理
6、拦截器HandlerInterceptor
7、集成Swagger实现API自动生成
8、集成knife4j实现API自动生成
9、Springboot集成MyBatis-Plus快速入门
10、springboot自定义注解及AOP切面使用
11、使用Shiro实现登陆和权限认证,基于MyBatis
12、集成SpringSecurity实现授权认证
13、SpringBoot集成EasyExcel实现数据导入与导出
14、Spring Task定时任务的实现
15、Quartz快速上手与实践
16、如何用代码实现Spring IOC
17、SpringBoot集成JWT,实现接口的鉴权交互
SpringCloud
Nacos作为服务注册中心
seata1.6.1 结合springcloud实现分布锁的技术笔记
一些技术博客推荐
前端面试相关
看这一篇就够了
java.util包常用的类和接口
CountDownLatch介绍与使用
Common-lang3使用入门
Hutool简单使用入门
lombok 介绍及基本使用方法
git项目统计成员代码行数和提交的次数
mysql 逗号分隔的数据 like查询
使用sonar进行代码质量检查
线上使用jmeter进行压测的时候,使用Arthas诊断工具排查响应慢的接口
php结合phpstudy8、vscode开启xdebug进行代码调试
node-red使用入门
本文档使用 MrDoc 发布
-
+
首页
php结合phpstudy8、vscode开启xdebug进行代码调试
> 参考:https://blog.csdn.net/weixin_63172698/article/details/135922901 参考上面这篇文章已经说的很到位了。一步一步来,肯定能成功。 我这里只强调一下 整体的步骤和细节: 我这里以php7.4.3版本为例: ## 第一步:配置环境变量 把php7.4.3的 目录加到 windows的path环境变量里。 ## 开启php的Xdebug 我这里使用的是`9003`端口,这个在前后要保持统一。 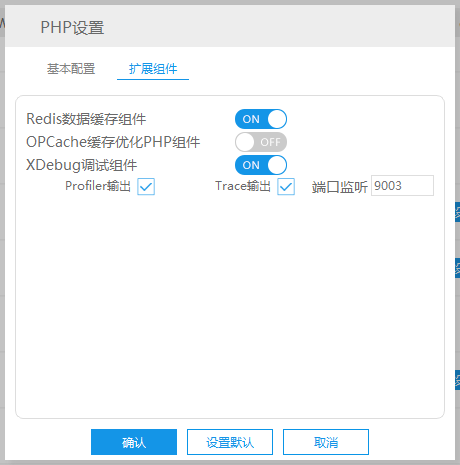 开启了xdebug之后,在php.ini里最底部肯定会生成 下面这段配置: ~~~ [Xdebug] zend_extension=C:/phpstudy_pro/Extensions/php/php7.4.3nts/ext/php_xdebug.dll xdebug.collect_params=1 xdebug.collect_return=1 xdebug.auto_trace=On xdebug.trace_output_dir=C:/phpstudy_pro/Extensions/php_log/php7.4.3nts.xdebug.trace xdebug.profiler_enable=On xdebug.profiler_output_dir="C:\phpstudy_pro\Extensions\tmp\xdebug" xdebug.remote_enable=On xdebug.remote_autostart = On xdebug.remote_host=localhost xdebug.remote_port=9003 xdebug.remote_handler=dbgp ~~~ == 注意一下: == 上面这段配置是自动生成的,但是!!!! `xdebug.remote_autostart = On` 这个是我后来加进去的!!! 我最开始没加,导致一直调试不了代码。 还有就是 `xdebug.remote_port=9003`的 9003端口,根据你的实际情况进行修改!!! ## 在vscode里安装插件 如图所示,把php debug的这个插件给装了。 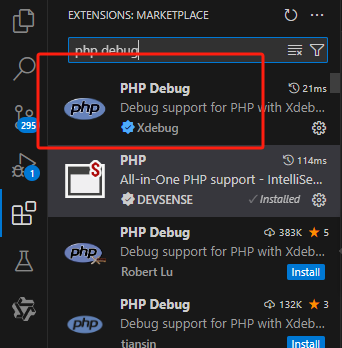 ## setting.json `php.validate.executablePath` 和 `php.debug.executablePath` 路径配置正确!!! ~~~ { "workbench.colorTheme": "Default Dark Modern", "workbench.startupEditor": "none", "workbench.iconTheme": "vscode-icons", "php.validate.executablePath": "C:\\phpstudy_pro\\Extensions\\php\\php7.4.3nts\\php.exe", "http.proxy": "", "terminal.integrated.enableMultiLinePasteWarning": false, "explorer.confirmPasteNative": false, "intelephense.format.braces": "k&r", "git.openRepositoryInParentFolders": "never", "php.debug.executablePath": "C:\\phpstudy_pro\\Extensions\\php\\php7.4.3nts\\php.exe" } ~~~ ## launch.json 下面两个都可以,但是注意端口一定要配置正确!!! ~~~ { "version": "0.2.0", "configurations": [ { "name": "Launch current script in console", "type": "php", "request": "launch", "program": "${file}", "cwd": "${fileDirname}", "externalConsole": false, "port": 9003 }, { "name": "Listen for XDebug", "type": "php", "request": "launch", "port": 9003 } ] } ~~~ ~~~ { "version": "0.2.0", "configurations": [ { "name": "Listen for Xdebug", "type": "php", "request": "launch", "port": 9003 }, { "name": "Launch currently open script", "type": "php", "request": "launch", "program": "${file}", "cwd": "${fileDirname}", "port": 0, "runtimeArgs": [ "-dxdebug.start_with_request=yes" ], "env": { "XDEBUG_MODE": "debug,develop", "XDEBUG_CONFIG": "client_port=${port}" } }, { "name": "Launch Built-in web server", "type": "php", "request": "launch", "runtimeArgs": [ "-dxdebug.mode=debug", "-dxdebug.start_with_request=yes", "-S", "localhost:0" ], "program": "", "cwd": "${workspaceRoot}", "port": 9003, "serverReadyAction": { "pattern": "Development Server \\(http://localhost:([0-9]+)\\) started", "uriFormat": "http://localhost:%s", "action": "openExternally" } } ] } ~~~ 最后: 选择这个Listen for Xdebug,然后 点击 那个绿色的小按钮就可以了。。  ## 控制台输出 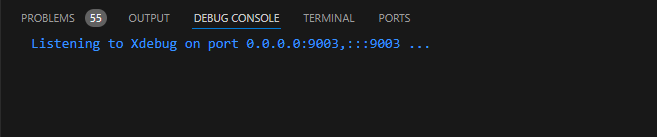 页面顶部: 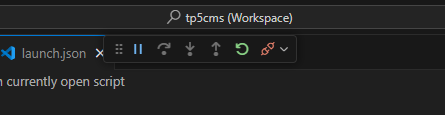
superadmin
2024年11月21日 15:07
转发文档
收藏文档
上一篇
下一篇
手机扫码
复制链接
手机扫一扫转发分享
复制链接
Markdown文件
分享
链接
类型
密码
更新密码